nodemailer
Nodemailer
To enable efficient email communication, we introduced Nodemailer in the 6.9.5 release. This enhancement allows for various essential functionalities, such as notifying users upon account creation, sending order summaries, distributing newsletters, managing email verifications, enabling Magic Link logins, and so on. We're excited about these additions and hope they elevate your user experience!
Now, let's explore the process of integrating Nodemailer with Gmail. Imagine we want to send an email when a user signs up.
Environment Variables:
We need to add some environment variables to our env file, which I assume you are familiar with. If you are unaware of this, we have thorough documentation that will help you.
SMTP_HOST=smtp.google.com
SMTP_PORT=465
SMTP_USER=[your-gmail-username]@gmail.com
SMTP_PASSWORD=[your-gmail-app-password]
As we're using Gmail, utilize SMTP_HOST and SMTP_PORT as mentioned earlier, and set SMTP_USER to your Gmail address.
For SMTP_PASSWORD, enable 2-Step Verification in your Google account by following this official documentation.
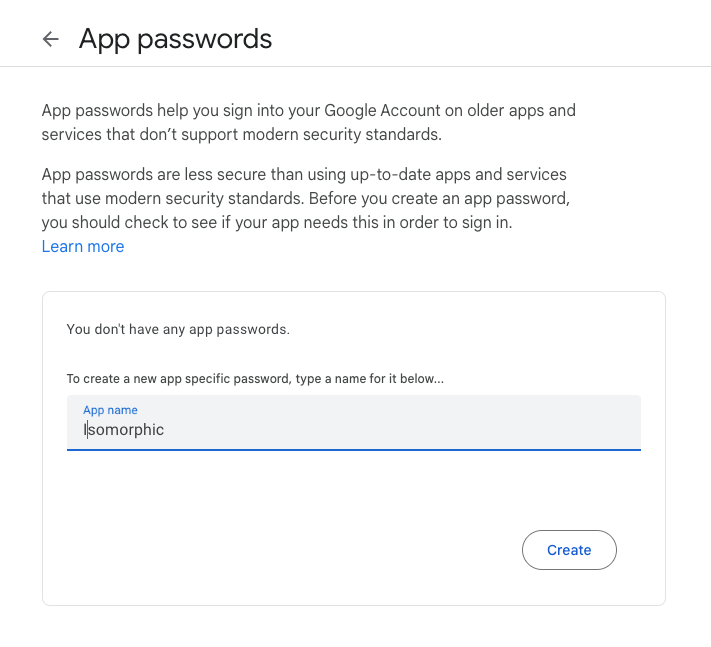
Once 2-Step Verification is active, visit https://myaccount.google.com/apppasswords enter your app name, and click on the create button.
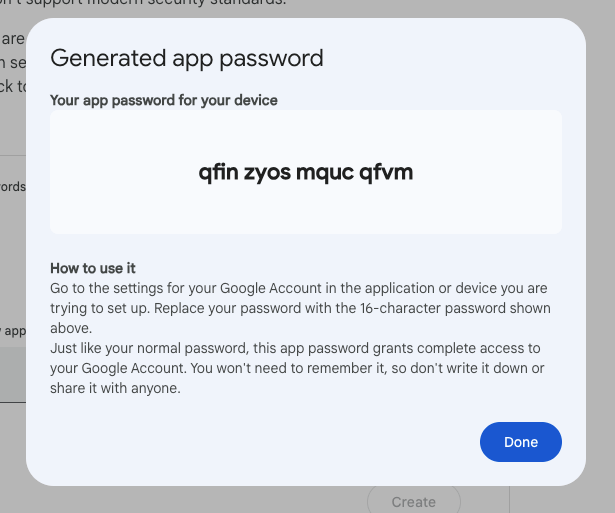
This action will generate a 16-digit password specific to this app—use it without spaces as your SMTP_PASSWORD.
Now, let's look at how to integrate Nodemailer with Gmail. Assume we wish to send an email when a person registers. We'll make advantage of Next.js's newest server action functionality.
With the '6.9.5' release, we already include a sample server action, which can be found in'src/server/actions/account-confirmation.action.ts'. such include the following
"use server";

import { render } from "@react-email/render";
import { sendEmail } from "@/utils/email";
import AccountConfirmationEmail from "@/email-templates/account-confirmation";

export const sendAccountConfirmationEmail = async ({
  email,
  name,
}: {
  email: string;
  name: string;
}) => {
  const to = `${name}<${email}>`;

  await sendEmail({
    to: to,
    subject: "Your Account is Created!",
    html: render(AccountConfirmationEmail(email, name)),
  });

  return true;
};
Now, navigate to apps/isomorphic/src/app/auth/(sign-up)/sign-up-1/sign-up-form.tsx. Begin by importing the necessary files.
import toast from "react-hot-toast";
import { sendAccountConfirmationEmail } from "@/server/actions/account-confirmation.action";
then locate the onSubmit function and make the necessary changes.
const onSubmit: SubmitHandler<SignUpSchema> = (userData) => {
  console.log(userData);

  try {
    // do your db operation here for creating user
    // await createUser(userData)
    // if this operation success then we're going to send the confirmation email
    try {
      await sendAccountConfirmationEmail(userData);
      toast.success(messages.emailSentSuccessfully);
      setReset({ ...initialValues, isAgreed: false });
    } catch (error) {
      console.log("error", error);
    }
  } catch (error) {
    throw new Error("Something went wrong, can not create user");
  }
};
And just like that, you're all set.